
How to Set Up an AccsZone Account on a DuoPlus Cloud Phone
This guide follows one account from purchase on AccsZone through to a configured, signed-in session on a DuoPlus Cloud Phone: choosing the listing, paying, collecting the credentials, configuring the proxy, letting the device environment follow it, and starting the device.
The example uses a Gmail account, because signing into Google is the step most new cloud phone users reach first — Google Play needs it. The workflow is the same for any account type AccsZone sells; only the final app changes.
Every step below was run end to end on 13 September 2026, on a DuoPlus free-trial Cloud Phone running Android 15 with a US SOCKS5 proxy. The screenshots are from that run.
What you'll need
- A DuoPlus account with at least one Cloud Phone. New accounts get a free trial device — 30 days, including 30 minutes of runtime — which is enough to follow this guide.
- A SOCKS5, HTTP or HTTPS proxy in the country you want the device to appear in.
- An AccsZone account with a funded balance. AccsZone takes cryptocurrency only.
- About 15 minutes.
Before you start: why the order matters
Two things make it worth configuring the device before the first sign-in rather than after.
DuoPlus builds the device environment from the proxy. A cloud phone has no network at all until a proxy is configured. Once one is attached, DuoPlus derives the device's location, SIM, time zone and language from the proxy's IP — the Simulation Settings all default to Based on IP. The proxy is not just connectivity; it decides what the device looks like.
AccsZone's replacement cover ends at the first successful login. Per AccsZone's FAQ, replacements apply to accounts that fail before first login; after that, responsibility moves to the buyer. Getting the environment right before that first sign-in costs a few minutes and is the cheapest point at which to fix a mismatch.
AccsZone's own guidance points the same way — match the proxy country to the account, and match the time zone. Both follow automatically from the proxy you pick in Step 5.
Step 1 — Choose an account that matches the region you'll work in
Open the AccsZone category for the account type you need. This guide uses Aged Gmail USA Accounts.
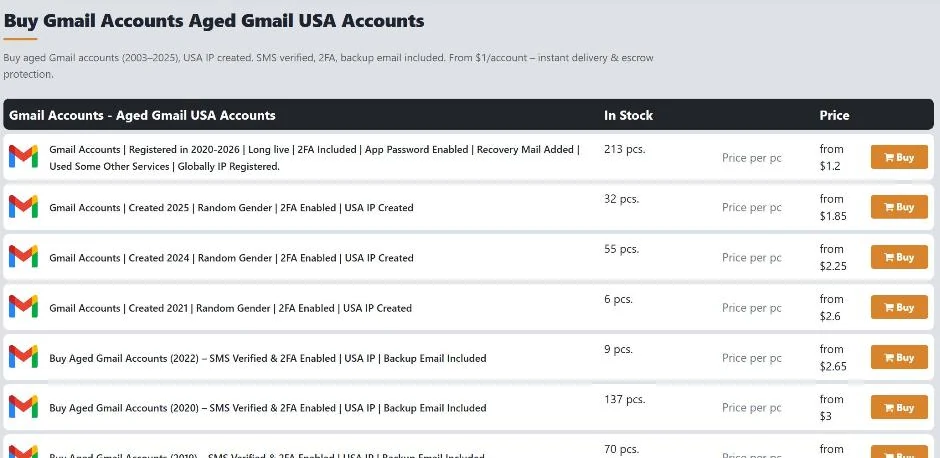
Each row shows the listing name, the stock, and the price per piece. The part that matters for this workflow is the region in the title — USA IP, Mixed IP, Globally IP Registered, and so on.
Pick a listing whose region you can actually match with a proxy. Buying a USA-registered account and then pointing the device at a European IP creates an inconsistency you would have to explain away later. This guide uses Buy Aged Gmail Accounts (2022) – SMS Verified & 2FA Enabled | USA IP | Backup Email Included, paired with a US proxy.
Step 2 — Read the product page before paying
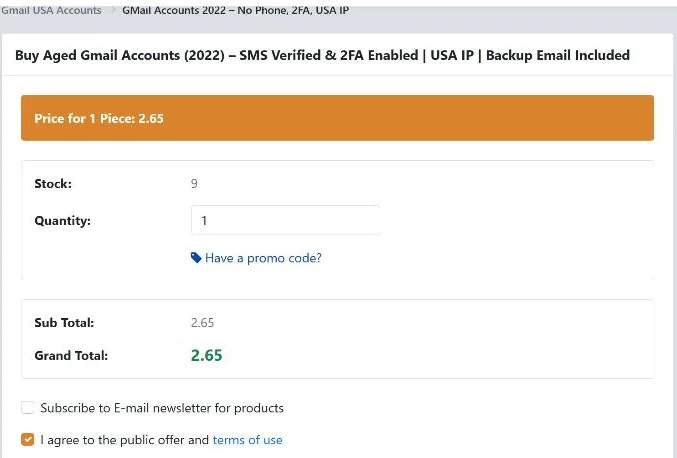
Four things are worth checking before you buy:
- Stock — listings sell out, and quantity cannot exceed it.
- Quantity — the sub total and grand total update as you change it.
- Have a promo code? — expands a field to apply a code before checkout.
- Account Format — further down the page; tells you exactly what you will receive.
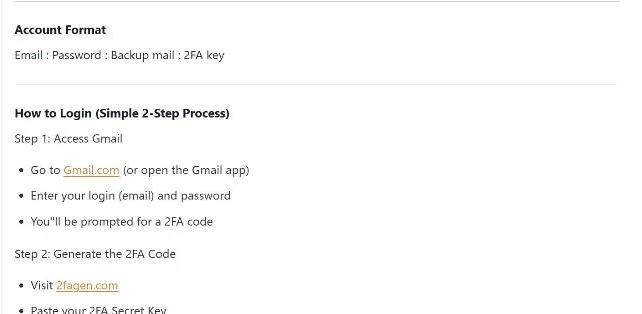
For this listing the delivery format is:
Email : Password : Backup mail : 2FA key
The 2FA key is a TOTP secret, not a code. You turn it into a six-digit code at sign-in time — AccsZone points to 2fagen.com, and any authenticator app that accepts a manually entered secret will also work. Keep this key; you will need it every time the account asks for a second factor.
Step 3 — Fund your balance and place the order
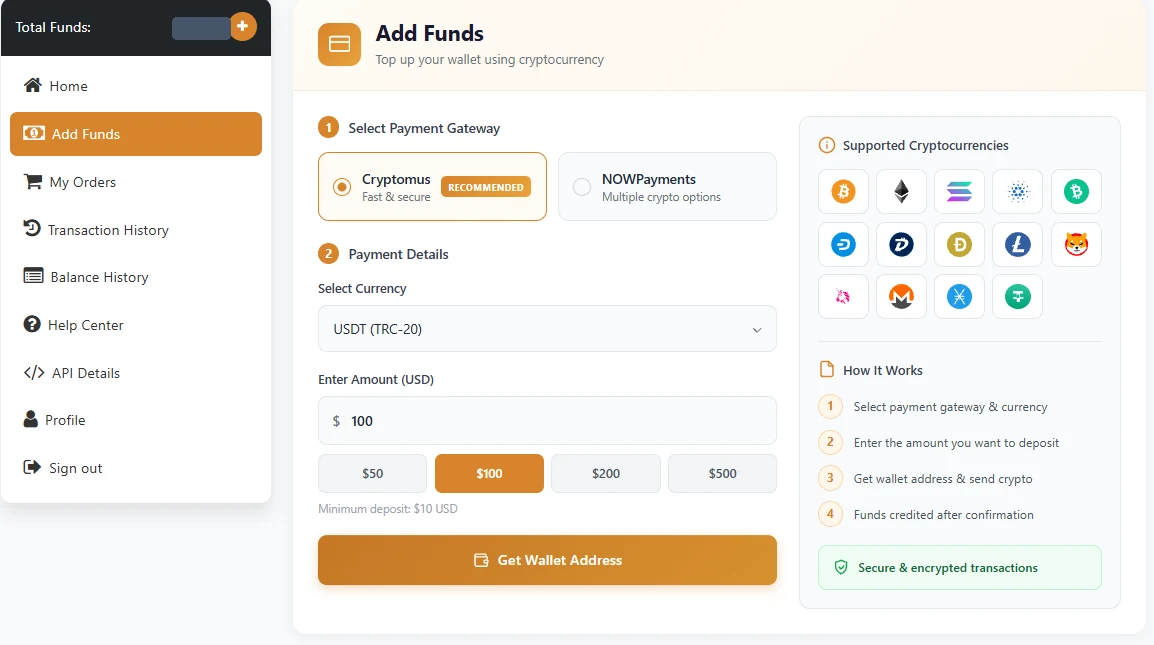
AccsZone runs on a wallet model: you top up a balance, and orders draw from it. Payment is cryptocurrency only.
Go to Add Funds, pick a payment gateway (Cryptomus or NOWPayments), choose a currency, enter an amount, and click Get Wallet Address.
The gateway then shows an invoice with the exact amount, the network, a countdown, and the address to send to.
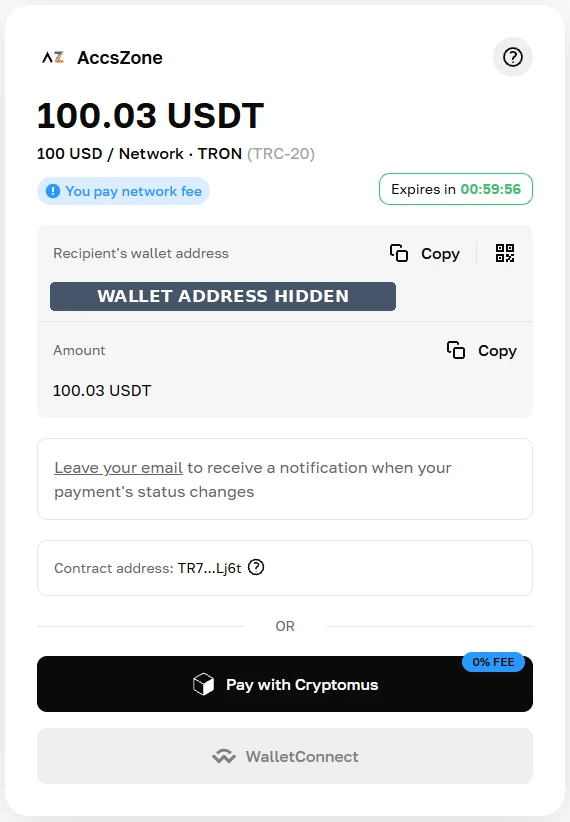
Send the exact amount on the exact network shown. The invoice above is for 100.03 USDT on TRON (TRC-20) — sending USDT on a different chain, or sending after the countdown expires, means the deposit will not credit automatically.
Once the deposit confirms, the balance updates and you can complete the purchase from the product page.
Step 4 — Collect your delivered account
Orders appear under My Orders. Open the order and you will find the account card with the credentials in the format the product page described.
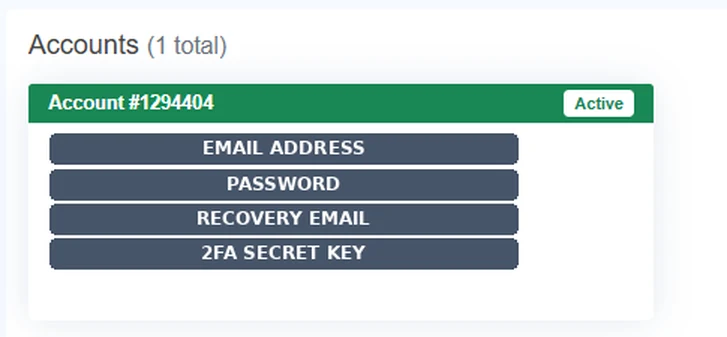
Copy all four values somewhere safe before you continue — particularly the 2FA secret key. Keep the order number too; AccsZone support asks for it.
Step 5 — Add the proxy to DuoPlus
In the DuoPlus dashboard, open Proxies in the left sidebar, then Add → Add.
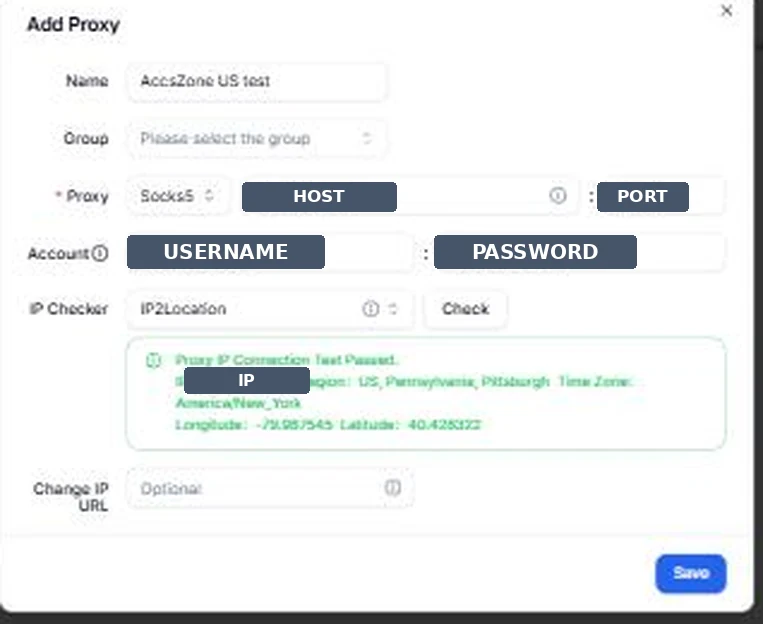
The Add Proxy dialog after a successful check. Host, port, credentials and the detected IP are redacted.
|
| Field | What goes in it |
|---|---|
| Name | Optional label. Worth setting so you can find the proxy later. |
| Group | Optional grouping. |
| Proxy | Protocol (Socks5, HTTP or HTTPS), then host or domain, then port. |
| Account | Username and password. Most paid proxies require these. |
| IP Checker | IP2Location or ip-api — the service used to detect the outbound IP. |
| Change IP URL | Optional rotation URL, if your provider offers one. |
Paste the proxy string rather than typing it. DuoPlus parses a pasted host:port:username:password string and fills all four fields automatically. Typing the same string by hand does not trigger the parser — the field simply reports "Please enter the correct IP or domain."
Click Check. On success the dialog returns Proxy IP Connection Test Passed together with the detected IP, region, time zone and coordinates. The button then changes from Check and Save to Save — click it to store the proxy.
Private and LAN addresses will not work. The cloud phone runs in DuoPlus's infrastructure, not on your machine, so 127.0.0.1, 192.168.x.x, 10.x.x.x, 172.16–31.x.x and fc00::/7 addresses are unreachable from it. If your provider uses IP whitelisting, ask them to allow DuoPlus's Singapore and Hong Kong ranges first.
Step 6 — Confirm the proxy resolves where you expect
The saved proxy appears in the list with its Outbound IP, the detected country, region and city, and the time it was checked.

Compare this against the account you bought. A USA-registered account should be paired with a proxy that resolves to the US. If the detected location is not what you expected, fix it here — it is far easier than after the device is running.
Step 7 — Set up the cloud phone
After you claim or buy a Cloud Phone, DuoPlus opens the Cloud Phone Settings page automatically. You can return to it at any time from the device list.
Under Network, the Proxy Type row offers four tabs:
- Custom Proxy — type or paste the proxy details directly. This is the default, and the quickest path on your very first device.
- List — pick a proxy you already saved in Step 5. This is the one to use once you have a proxy library.
- Dynamic Proxy — for rotating proxies.
- Proxy Provider — proxies bought inside DuoPlus.
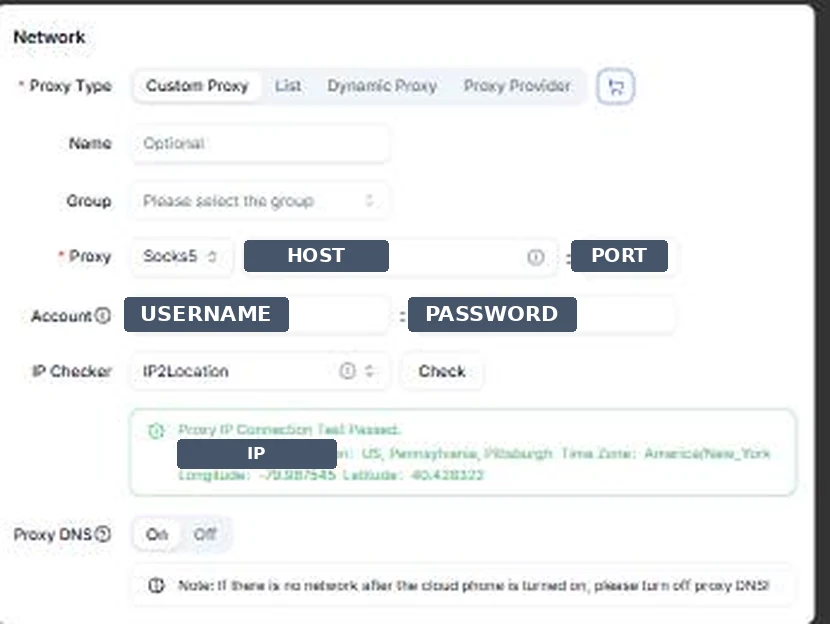
Run Check again here, and confirm the same green result before continuing.
Proxy DNS sits directly below the proxy fields and is on by default. Leave it on. If the device turns out to have no network once it is running, come back and switch it off — DuoPlus notes that some proxies do not support DNS resolution. Be aware that turning it off can cause DNS leaks and weakens the device emulation.
Step 8 — Let the device environment follow the proxy
Below the network panel is Simulation Settings. This is where the region matching actually happens.
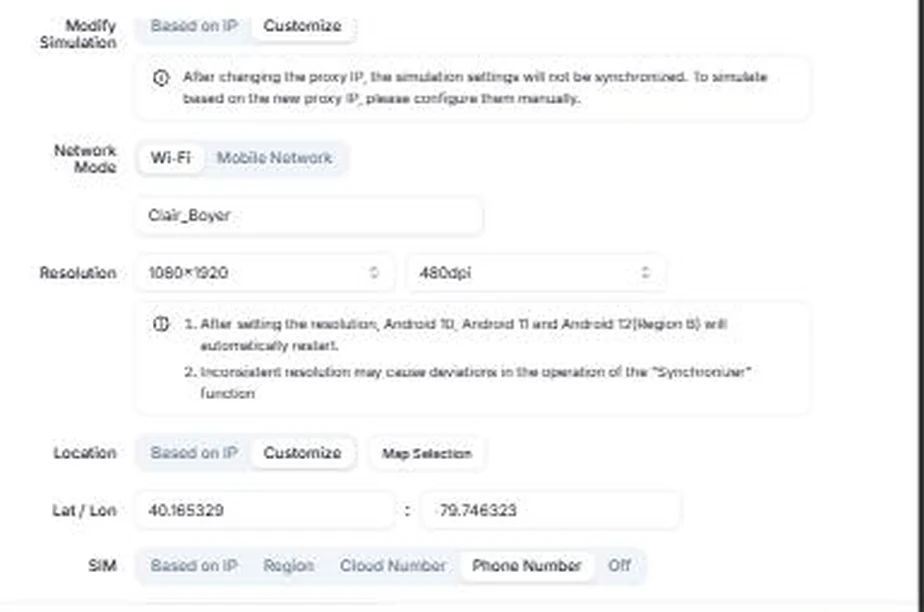
Leave these on Based on IP. That is what makes the device's location, SIM, time zone and language line up with the proxy you verified in Step 6 — you do not have to look up the right time zone yourself. The latitude and longitude fields populate from the proxy's detected coordinates.
Only switch an item to Customize when you have a specific reason, and remember that a value you set by hand no longer tracks the proxy.
If you change the proxy on an existing device later, the simulation settings do not re-synchronise on their own. DuoPlus states this directly in the Edit Params dialog: "After changing the proxy IP, the simulation settings will not be synchronized. To simulate based on the new proxy IP, please configure them manually."
Click Start Configuration when you are done. These values stay editable later from the device row's … menu → Edit Params.
Step 9 — Start the cloud phone
Back in the Cloud Phone list, the device now shows its assigned IP and location. Click Power On.

Once it is on, you have three ways to view it: Connect opens the device in its own window, Live Preview renders it inside the dashboard, and Focus Mode gives it a larger single-device view.
With Temporary Startup you are charged for runtime, so shut the device down when you have finished. Subscription Startup is a flat monthly fee with unlimited startups, and one subscription can be shared across devices in turn.
Step 10 — Open the app you need
The device boots to a standard Android home screen.
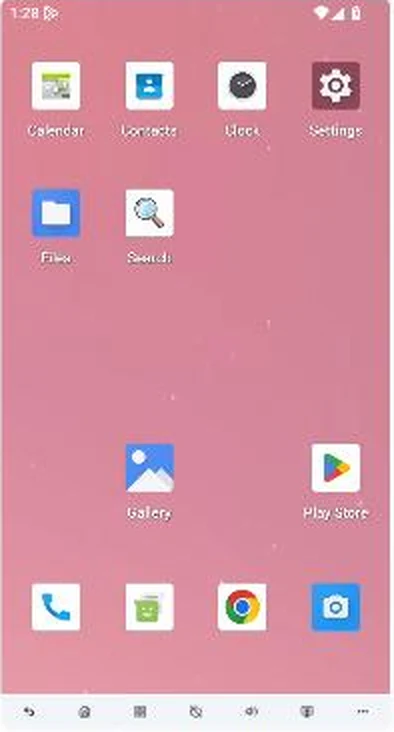
For a Gmail account, Chrome on the home screen is enough. For other account types, install the app first — the DuoPlus App Manager is the quickest route, and Google Play, Uptodown, manual APK upload and browser download all work too.
Step 11 — Sign in
Open the sign-in page for the service and sign in the way you normally would:
- Enter the email address from the order.
- Enter the password from the order.
- When prompted for a verification code, generate one from the 2FA secret key — paste it into 2fagen.com or an authenticator app and copy the six-digit code.
- Enter the code.
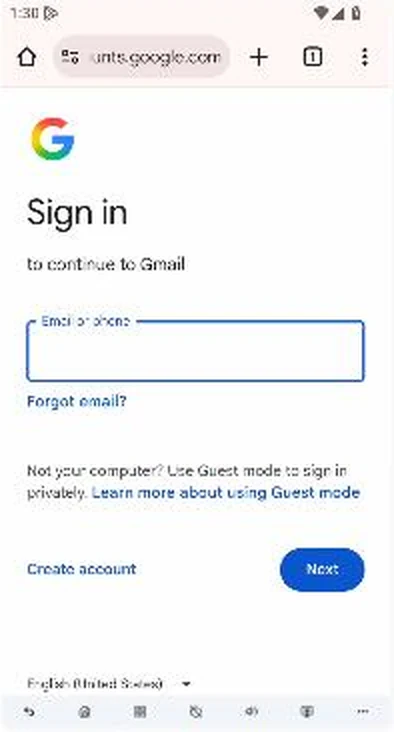
Platform security checks can still appear. A consistent proxy, time zone and language remove the obvious mismatches, but no configuration prevents a platform from asking for additional verification, and no setup can guarantee that a third-party service will accept a login.
Step 12 — Confirm the environment
Two checks confirm the device really is running in the region you configured.
On the device, open Settings → Date & time. The time zone should match the proxy's region rather than your own.
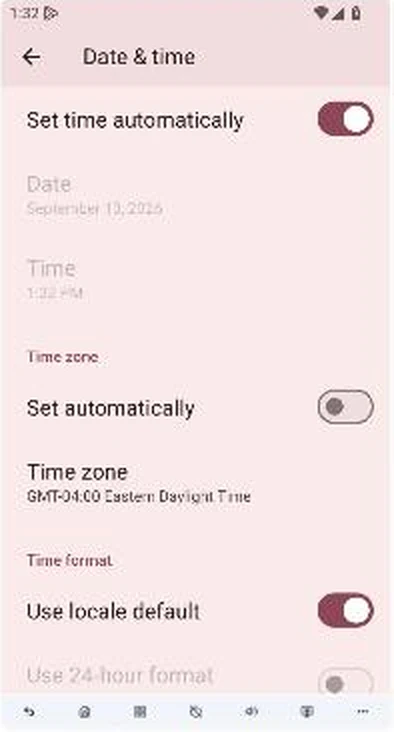
In the dashboard, check that the Outbound IP on the Proxies page still shows the expected country. If both agree, the device environment and the account's region are aligned.
If you plan to keep using the device, leave the same proxy attached to it. Rotating one device between unrelated IPs and regions is the most common cause of avoidable friction — and, as noted in Step 8, the simulation settings will not follow a proxy change on their own.
Troubleshooting
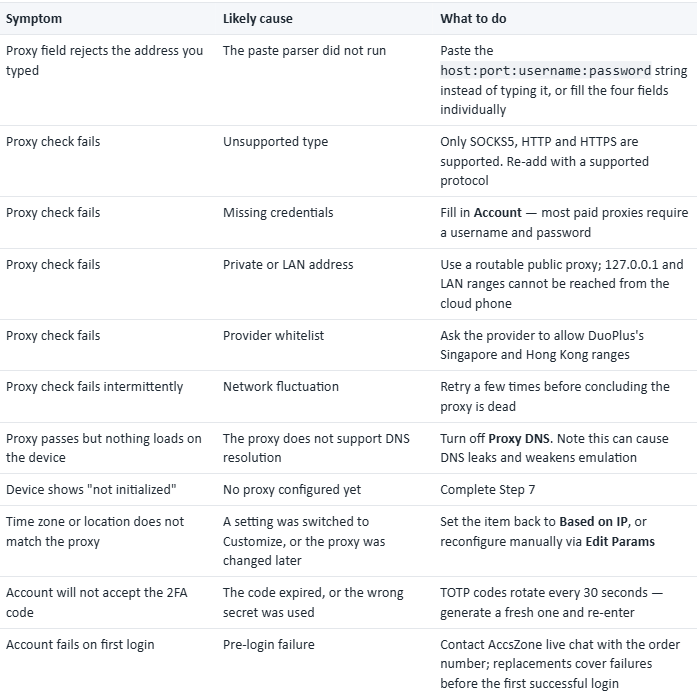
FAQ
Do I need a proxy at all?
Yes. A cloud phone has no network until one is configured, and the device's location, SIM, time zone and language are all derived from it.
Can I use one proxy for several cloud phones?
Technically yes, but a shared IP is visible to the services you sign into. DuoPlus's own guidance is to avoid IPs shared by multiple devices or people.
Do I have to set the time zone myself to match the account?
No. Leave Time Zone & Region on Based on IP and it follows the proxy. On the tested device this produced Eastern Daylight Time from a Pittsburgh proxy without any manual input.
Can the cloud phone receive an SMS code?
Not from the simulated SIM — simulated SIMs cannot send or receive messages. DuoPlus Cloud Numbers can receive verification codes and work on Android 12A and Android 15. Accounts that ship with a recovery email or a 2FA secret avoid the problem entirely.
Which Android version should I pick?
DuoPlus offers Android 15, 12 (Region A and B), 11 and 10. Android 15 is the current default; pick an older version only if a specific app requires it.
Does DuoPlus sell proxies?
Yes. Proxies can now be bought inside the dashboard from the Proxies page, alongside the option to bring your own.
Related documentation
Standard Proxy Configuration
Initialize Proxy
Proxy Introduction and Common Issues
Proxy Detection Failing
Cloud phone has no network
Parameter Modification
App Installation
What is Temporary Startup and Subscription Startup
;}.cls-2{fill:%230868f7;}.cls-3{fill:url(%23未命名的渐变_44);}.cls-4{fill:%23333;}%3c/style%3e%3clinearGradient%20id='未命名的渐变_8'%20x1='33.73'%20y1='100.61'%20x2='-0.03'%20y2='-1.06'%20gradientUnits='userSpaceOnUse'%3e%3cstop%20offset='0'%20stop-color='%237ae9fb'/%3e%3cstop%20offset='0.67'%20stop-color='%232b90f8'/%3e%3cstop%20offset='1'%20stop-color='%230868f7'/%3e%3c/linearGradient%3e%3clinearGradient%20id='未命名的渐变_44'%20x1='27.86'%20y1='18.67'%20x2='68.36'%20y2='22.22'%20gradientUnits='userSpaceOnUse'%3e%3cstop%20offset='0'%20stop-color='%235ac7f2'/%3e%3cstop%20offset='1'%20stop-color='%230868f7'/%3e%3c/linearGradient%3e%3c/defs%3e%3cpath%20class='cls-1'%20d='M29,28.74V81.91l-9.51-3.68v0L8.52,74A7.17,7.17,0,0,1,4,67.32V24.54A3.76,3.76,0,0,1,9.08,21Z'/%3e%3cpath%20class='cls-2'%20d='M68.09,78.07a13.15,13.15,0,0,1-17.9,12.06L29,81.91h0V28.74L50.19,37A13.17,13.17,0,0,0,68.08,25.3h0Z'/%3e%3cpath%20class='cls-3'%20d='M68.08,25.3a13.19,13.19,0,0,1-6.73,10.87A13.09,13.09,0,0,1,50.19,37L29,28.74V6A3.76,3.76,0,0,1,34.1,2.52l25.59,9.91A13.22,13.22,0,0,1,68.08,25.3Z'/%3e%3cpath%20class='cls-4'%20d='M129.06,81.76a4.33,4.33,0,0,1-3.19-1.31,4.4,4.4,0,0,1-1.31-3.24V56.86H97.65V77.21a4.36,4.36,0,0,1-1.35,3.2A4.68,4.68,0,0,1,93,81.76a4.32,4.32,0,0,1-3.19-1.31,4.37,4.37,0,0,1-1.32-3.24V27.27A4.58,4.58,0,0,1,89.83,24a4.59,4.59,0,0,1,7.82,3.27V48.15h26.91V27.27A4.58,4.58,0,0,1,125.91,24a4.59,4.59,0,0,1,7.82,3.27V77.21a4.37,4.37,0,0,1-1.36,3.2A4.65,4.65,0,0,1,129.06,81.76Z'/%3e%3cpath%20class='cls-4'%20d='M163.77,81.66c-6.57,0-11.76-1.92-15.44-5.7s-5.54-9.07-5.54-15.74a26.76,26.76,0,0,1,2.09-10.43,17.72,17.72,0,0,1,6.67-8.06,19.15,19.15,0,0,1,10.68-2.95,19,19,0,0,1,10.46,2.8,18.7,18.7,0,0,1,6.55,7.36,22.53,22.53,0,0,1,2.36,10.28A4.51,4.51,0,0,1,177,63.77H152.23a10.8,10.8,0,0,0,3.49,6.65c2,1.68,4.88,2.52,8.66,2.52a22.25,22.25,0,0,0,7.54-1.21c.74-.3,1.55-.67,2.37-1.07a3.75,3.75,0,0,1,1.84-.4,4.09,4.09,0,0,1,3,1.15,4,4,0,0,1,1.12,3,4.38,4.38,0,0,1-2.58,3.82,32.34,32.34,0,0,1-6.36,2.61A28.67,28.67,0,0,1,163.77,81.66ZM172.4,55.9a9.72,9.72,0,0,0-1.63-4.56A9.9,9.9,0,0,0,167,48a10.38,10.38,0,0,0-4.64-1.14,12,12,0,0,0-4.77,1.06,9.54,9.54,0,0,0-4.89,5.66,11.78,11.78,0,0,0-.51,2.3Z'/%3e%3cpath%20class='cls-4'%20d='M193,81.64a4.49,4.49,0,0,1-4.51-4.55V27.28A4.58,4.58,0,0,1,189.84,24a4.48,4.48,0,0,1,3.28-1.36A4.36,4.36,0,0,1,196.35,24a4.46,4.46,0,0,1,1.31,3.31V77.09a4.34,4.34,0,0,1-1.35,3.2A4.67,4.67,0,0,1,193,81.64Z'/%3e%3cpath%20class='cls-4'%20d='M263.79,81.71a5.7,5.7,0,0,1-4.2-1.74,5.76,5.76,0,0,1-1.73-4.19V27.37a4.58,4.58,0,0,1,1.35-3.27A4.59,4.59,0,0,1,267,27.37V72.53h24a4.58,4.58,0,0,1,3.27,7.82A4.66,4.66,0,0,1,291,81.71Z'/%3e%3cpath%20class='cls-4'%20d='M424.48,81.74a4.71,4.71,0,0,1-2.71-.88,5.43,5.43,0,0,1-1-1l-.07-.09-12.41-17-5.41,5v9.44a4.31,4.31,0,0,1-1.36,3.19,4.66,4.66,0,0,1-3.3,1.36A4.29,4.29,0,0,1,395,80.42a4.36,4.36,0,0,1-1.32-3.23V27.37A4.58,4.58,0,0,1,395,24.1a4.52,4.52,0,0,1,6.58.12,4.54,4.54,0,0,1,1.24,3.15V56.31l17.72-16.38.05,0a4.8,4.8,0,0,1,2.94-1.11,4.4,4.4,0,0,1,3.27,1.2,4.57,4.57,0,0,1,1.2,3.27,4.44,4.44,0,0,1-.77,2.33,7.45,7.45,0,0,1-1.43,1.65l-11,9.64,13.34,17.68a5,5,0,0,1,1,2.71,4.12,4.12,0,0,1-1.36,3.24A4.64,4.64,0,0,1,424.48,81.74Z'/%3e%3cpath%20class='cls-4'%20d='M317.93,81.76a21.5,21.5,0,1,1,21.17-21.5A21.37,21.37,0,0,1,317.93,81.76Zm0-34.1a12.61,12.61,0,1,0,12.42,12.6A12.52,12.52,0,0,0,317.93,47.66Z'/%3e%3cpath%20class='cls-4'%20d='M212.18,101.22a4.12,4.12,0,0,1-3.05-1.26,4.17,4.17,0,0,1-1.26-3.1V43.34a4.37,4.37,0,0,1,1.3-3.14,4.26,4.26,0,0,1,3.13-1.3,4.19,4.19,0,0,1,3.1,1.26,4.32,4.32,0,0,1,1.26,3.16,20.77,20.77,0,0,1,13-4.54,21.51,21.51,0,0,1,0,43,20.51,20.51,0,0,1-13-4.57V96.86a4.15,4.15,0,0,1-1.3,3.06A4.5,4.5,0,0,1,212.18,101.22Zm17.43-53.63c-6.23,0-12.93,4.11-12.93,12.72a12.73,12.73,0,0,0,25.46,0A12.71,12.71,0,0,0,229.61,47.59Z'/%3e%3cpath%20class='cls-4'%20d='M365.76,81.76a21.5,21.5,0,1,1,21.18-21.5A21.37,21.37,0,0,1,365.76,81.76Zm0-34.1a12.61,12.61,0,1,0,12.42,12.6A12.52,12.52,0,0,0,365.76,47.66Z'/%3e%3c/svg%3e)